Adding a Custom Facebook Tab to your Facebook Page is a pretty simple task as long as you know the steps. This tutorial will show you how to add a custom Facebook tab in minutes.
Before we add a custom Facebook Tab to your page, first you must have created a Facebook page. (you cannot add to your personal page) So if you have not created a page, you can create one from https://www.facebook.com/pages.
Step One – Searching for the Facebook Page Tab App:
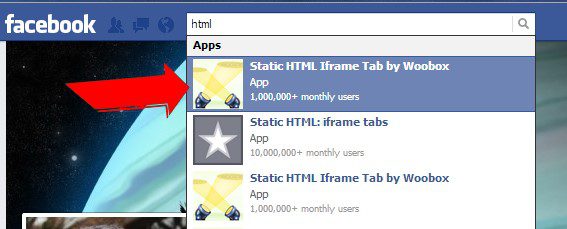
From the search bar at the top of your personal Facebook Page (not the business page), search for "html". There are several apps to choose from, but the one I feel has the most features and flexibility is the "Static HTML Iframe Tab by Woobox"

Step Two – Select the HTML App:
After clicking the "Static HTML Iframe Tab by Woobox", click on the "Install Page Tab"
Step Three – Add the App to your Facebook Page:
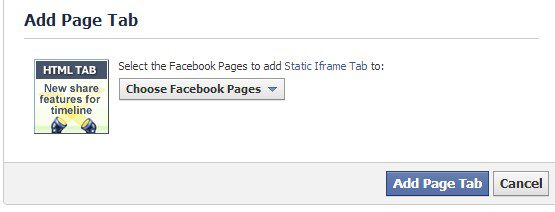
If you have more than one Facebook page, choose the Facebook page to add the app to and then select "Add Page Tab"

Step Four – Editing the HTML code:
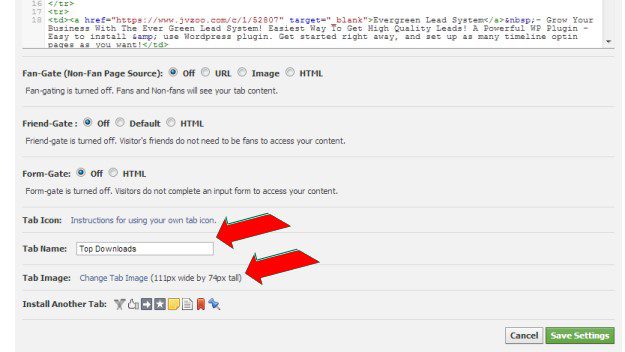
Now you will be on the page editor. If you would like to add html, be sure your settings are on "html" and "Source" and then add your html code. You can then view the page by selecting "editor".

Step Five – Changing Facebook Tab Name and Facebook Tab Image:
Scroll down the page and change the "Tab Name" and then add a "Tab Image". The tab image must be exactly 111px wide by 74px tall. Then click "Save Settings"

Step Six – Adjusting Your Facebook Tab Location:
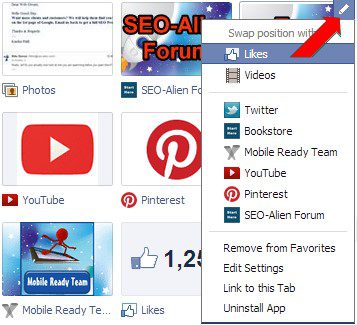
Go to your page and locate your Tabs. On the far right, locate the dropdown arrow and click it.

Step Seven – Swapping Facebook Tab Position:
Then click the arrow from the top right of the selected tab and choose what tab you would like to "Swap Position with". If you would like to edit the page, click "Edit Settings".

And that's all there is to it! Now you have created a Custom Facebook Tab for your Facebook Page!


