If you are looking to make a WordPress website faster, here is a step by step on how to do just that. Make your WordPress website faster with the W3 Total Cache plugin.
- WP Super Cache
- W3 Total Cache
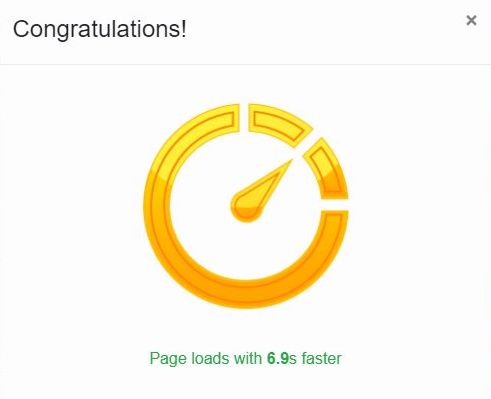
I ended up speeding up the website a ton, so much so that one of the plugins I am using for SEO (Squirrly SEO Plugin) sent me a congratulations pop up when I logged into the admin.
But, because I added the cache plugin and the CDN at essentially the same time, my results are not accurate because they are showing both the CDN results and the cache plugin results, so I felt it was not quite fair to use that comparison.
So, knowing that the WP Super Cache worked well on the SEO-Alien website, I thought I would test the W3 Total Cache plugin on another website, and below is the step by step on what I did, and the results it received.
Hope it helps you on your quest to make a WordPress website faster.
Case Study: Does W3 Total Cache Make a WordPress Website Faster?
The site I am testing the W3 Total Cache plugin on is another website* I have that has nothing but quizzes embedded on. I have not done much with this site in the last 3 years other than keep the plugins and themes updated. *(August 2021 that site was removed).
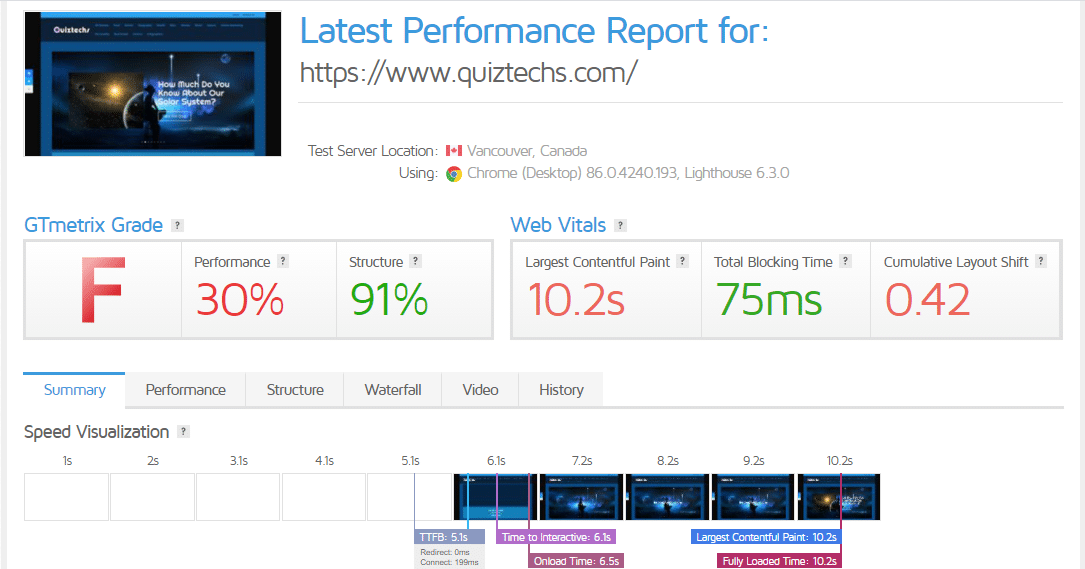
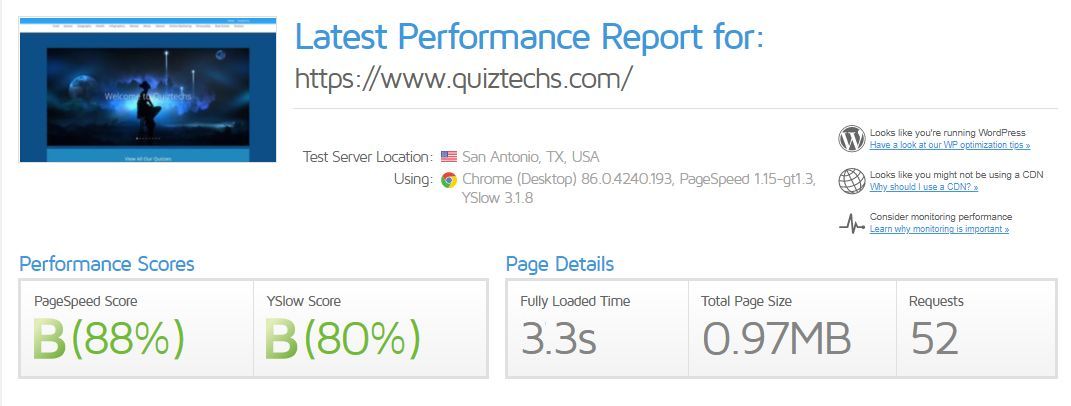
The first thing you will want to perform is a speed test, then save that test result so you can compare. The site I recommend you use for your website speed test is GTMetrix.com.
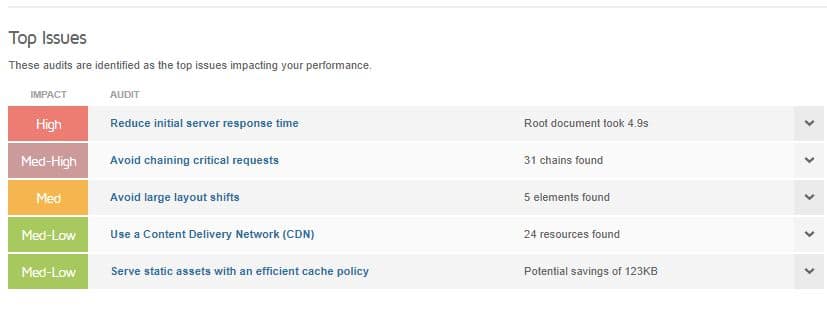
As you can see below, Quiztechs did not get a passing grade on the first performance test.
So the first question we might have is how do we reduce server response times?
Well, there are several strategies that will improve your server response times, but let's focus on the main ones that should significantly speed up the website.
- Optimizing your application code (including database queries).
- Implementing server-side caching.
- Upgrading server hardware for more CPU or memory resources.
If you are anything like me, #3 scares me. That is beyond my level of expertise and you would most likely need a good budget to hire an expert. However, #1 and 2 are very achievable, even by a novice WordPress user.
The solution here would be to try a caching plugin, but with so many out there, what one should you chose? My recommendation is W3 Total Cache.
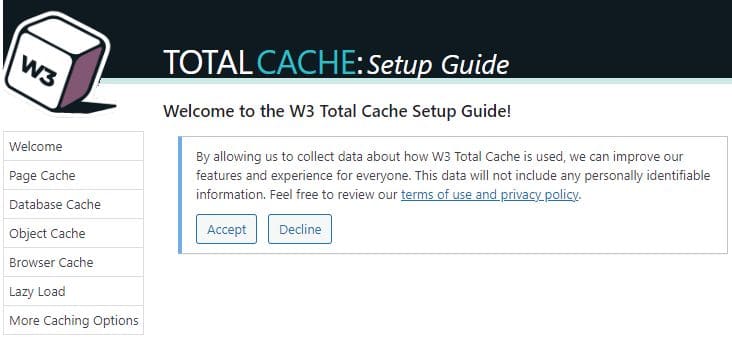
W3 Total Cache will also walk you though all the steps after installation so it will be set up best for your website and hosting, and I will share a few of the most common settings below so it is even more clear, because it can get a bit complicated.
Step 2: After you active the plugin, locate "Performance" from the left menu and place your mouse over it, then click "Setup Guide". This will prompt you to walk you through the W3 Total Cache Setup!
Step 4: The next step is the Page Cache. This is the time it takes between a visitor's browser page request and receiving the first byte of a response and what we earlier referred to as Time to First Byte. W3 Total Cache can help you speed up Time to First Byte by using Page Cache. Choose the recommended setting, in our case it was Disk: Enhanced (Recommended), and then click next.
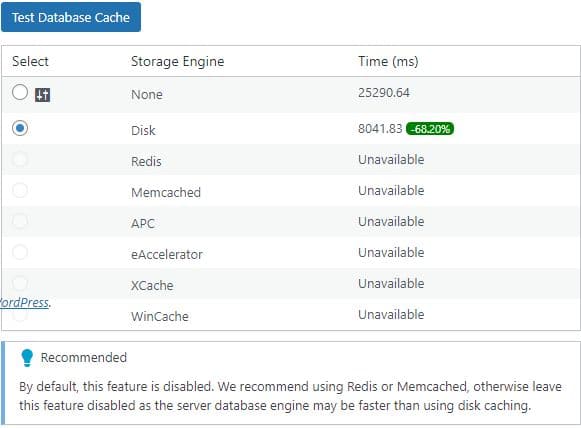
Step 5: Test Database Cache. Many database queries are made in every dynamic page request. A database cache may speed up the generation of dynamic pages. Database Cache serves query results directly from a storage engine.
As seen in the image below, I chose "Disk" as it saved 68% of loading time. (we can always go back and change this late if needed).
Step 6: Test the Object Cache. WordPress caches objects used to build pages, but does not reuse them for future page requests. W3 Total Cache can help you speed up dynamic pages by persistently storing objects. Again, chose the best one for your site and then click Next'.
Step 7: Test the Browser Cache. To render your website, browsers must download many different types of assets, including javascript files, CSS stylesheets, images, and more. For most assets, once a browser has downloaded them, they shouldn't have to download them again. W3 Total Cache can help ensure browsers are properly caching your assets. Chose 'Enabled' and then click next.
Step 8: Lazy Load Pages. Absolutely yes, chose to Lazy Load Images. Containing images and other objects can have their load time reduced by deferring them until they are needed. Select the radio button and click 'Next'.
Step 9: Your have now completed the W3 Total Cache setup. First, check your website. Go from your home page to other posts or pages to be sure the site is loading images and is being displayed correctly. Assuming it is, now retest the websites speed from GTMetrix.
And with that being said, I feel that this worked out well, and if you want to make a WordPress website faster, we hope it does the same for you.
About the Author:
The SEO-Alien is a project started in 2009 regarding all things online marketing. The site started out more of a diary of predictions, suggestions and references to things I frequently used for online marketing... before social media marketing was even an option.
I hope you find the information and tools presented here useful and something worth sharing with others.
If there is anything else about online marketing or any online advertising strategy you think would be helpful, please let me know.

